



The Luvme Sleek Short Bob Wig is designed for a polished short style with a glueless fit, pre-cut lace, and an adjustable cap. The key to an easy first wear is preparing a flat base, positioning the elastic band correctly, centering the hairline, and making only the styling adjustments the bob actually needs.
This beginner guide walks through the cap details, installation, lace finishing, and styling process so you can move from unboxing to a smooth, balanced bob without overworking the hair.
Sleek Short Bob Wig Video Tutorial
Watch the complete process first to see how the wig is prepared, positioned, adjusted, and reshaped. Then use the detailed steps below when installing your own wig.
Overview of Cap Details
Before installation, take a moment to understand the cap. These features work together to help the wig sit closer to the head while keeping the installation simple and glueless.
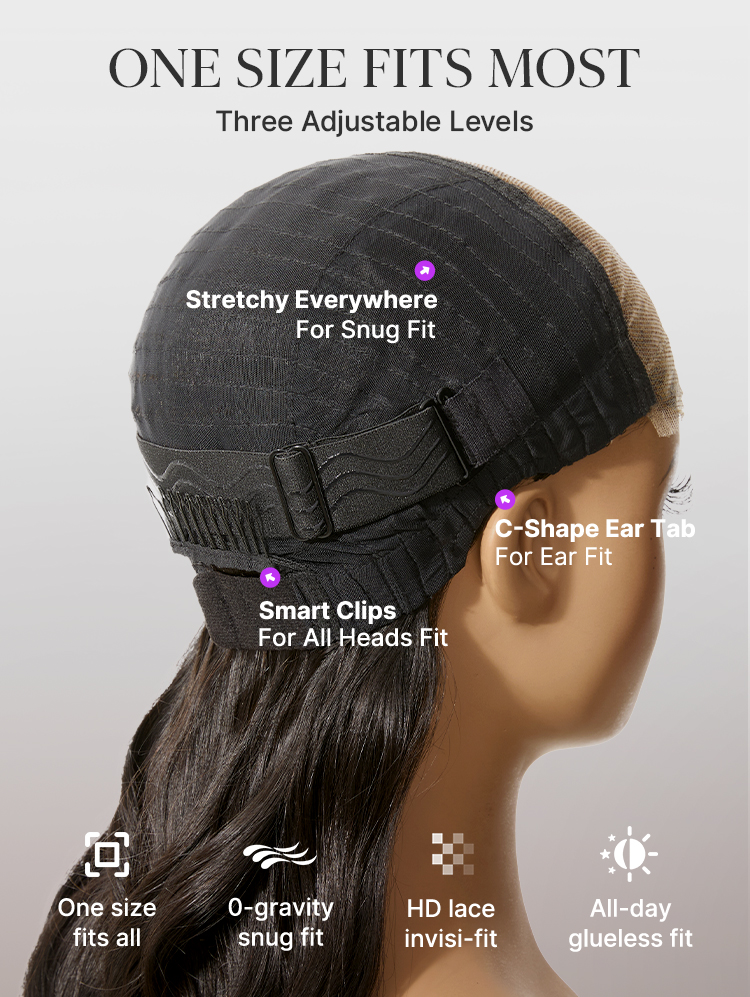
One Size Fits Most
Three Adjustable Levels
Use the adjustable settings to fine-tune the fit before styling. Start with a comfortable level and tighten only when more hold is needed. A secure fit should feel stable without creating pressure around the temples or hairline.

Lightweight Comfort
Breathable Enough for All-Day Wear
The lightweight cap is designed to reduce unnecessary bulk under the short bob. A flatter base also helps the crown and back of the hairstyle sit more naturally.
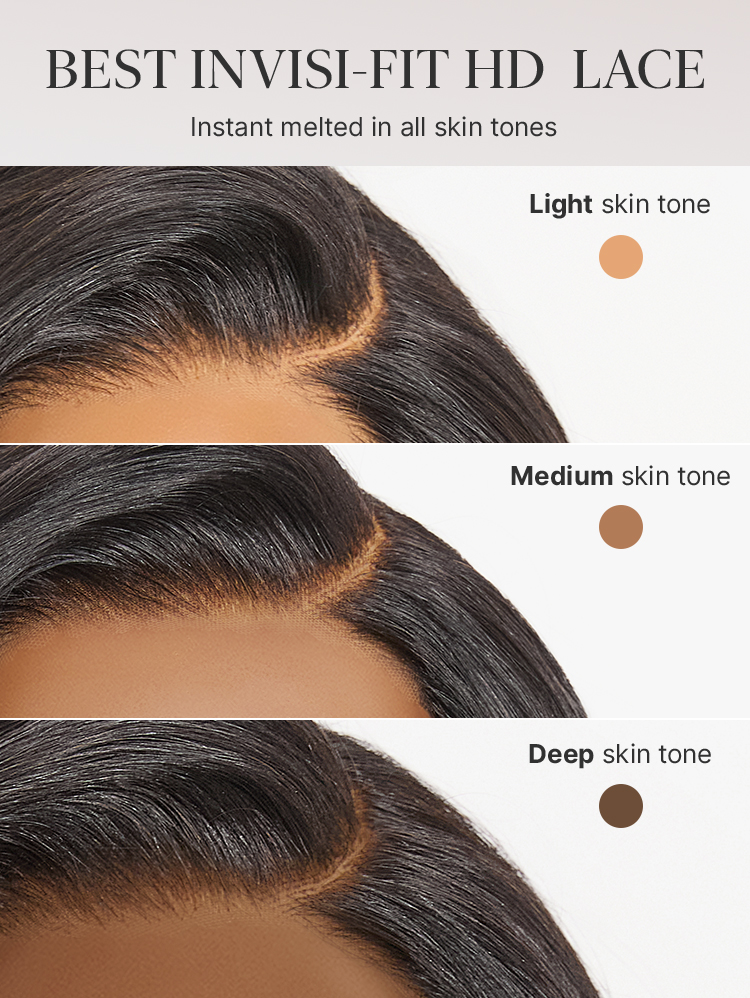
Best Invisi-Fit HD Lace
The lace creates the visible hairline area of the wig. Because it is already pre-cut, installation is mainly about positioning it correctly and making small cosmetic adjustments rather than cutting a new hairline from scratch.
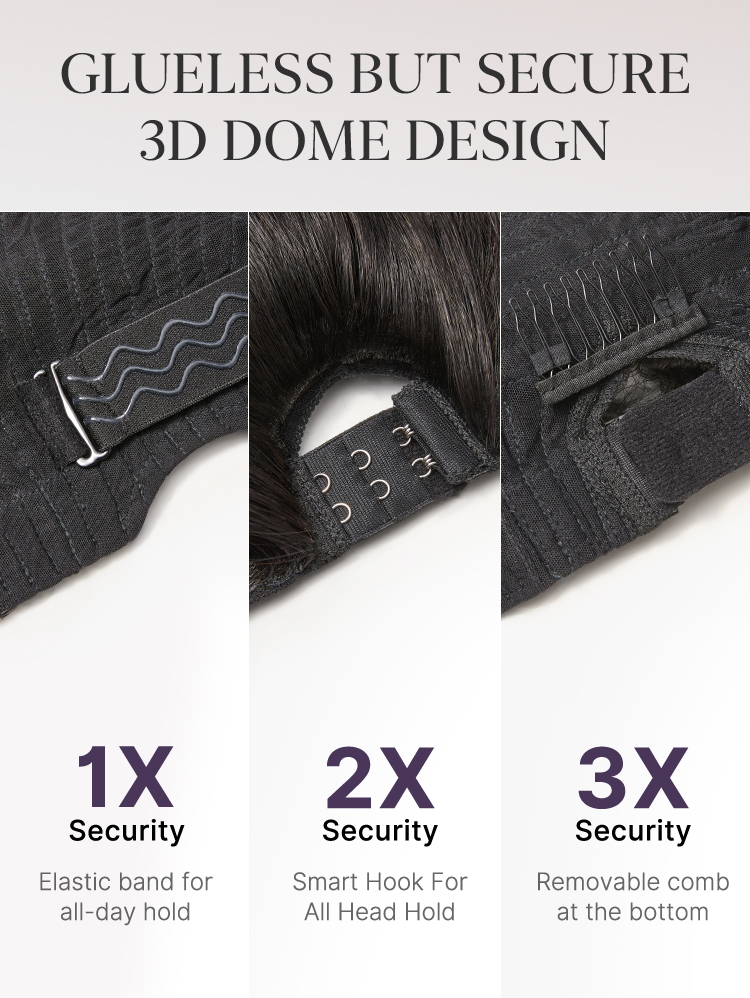
Glueless but Secure
3D Dome Design
The dome-shaped cap is intended to follow the shape of the head more naturally. Correct cap adjustment and elastic-band placement are therefore more important than simply pulling the wig tighter.

PreMax
100% Natural & Effortless
The pre-finished details are designed to reduce the amount of work needed before first wear. Instead of rebuilding the wig from the beginning, focus on fit, hairline placement, and light reshaping of the bob.
How to Put On the Sleek Short Bob Wig Step by Step
Prep Before You Put It On
A short bob shows the shape of the head more clearly than longer styles, so begin with the flattest comfortable base you can create. You can use either of these two preparation methods.
Create flat braids that distribute your natural hair evenly. Avoid leaving a bulky area at the crown or nape because it can change the bob's finished silhouette.
Divide the hair into two low ponytails and secure them flat against the back of the head with clips. Keep the base low and compact rather than stacking hair at the crown.

Install the Elastic Band
Attach the elastic band to the designated points inside the cap before putting on the wig. Make sure the band is not twisted and is set to a comfortable tension. It should support the fit without creating unnecessary pressure.

Put On and Adjust the Fit
Put the wig on from the back first. If you prepared two low ponytails, position the elastic band underneath them so the band can sit securely against the head. Then bring the front of the wig forward gradually instead of pulling hard on the lace.

How to Style Your Bob
Wig Care Tools: Prepare Them in Advance
Keeping the tools within reach makes it easier to style the bob in controlled sections instead of repeatedly stopping and restarting.

Lightly Blend the Forehead Lace With Contour Powder
Reshape the Bob
Once the wig is secure and the lace is positioned, reshape only the areas that need correction. A short bob looks best when the crown, front, sides, and back work together as one balanced silhouette.
Apply it before using a flat iron or curling iron and distribute it lightly through the sections you plan to restyle.
Clip away the remaining hair so each section can be controlled without repeatedly passing heat over finished areas.
Use controlled passes to refine the sleek shape rather than pressing the entire wig repeatedly.

Use the iron only where the ends need direction or the bob needs a softer curve.
Adjust the face-framing pieces so they complement the part and sit naturally around the face.
Use a small mirror to inspect the nape and make sure the bob line is smooth rather than uneven or flipped outward.
Let the hair settle, then use your fingers to separate and position the final shape. Add only a light holding spray if needed.
Finished Look: Front · Side · Back
Before you finish, check the style from more than one angle. Small corrections are usually easier than restyling the whole wig.
Conclusion
Installing the Luvme Sleek Short Bob Wig is mainly about creating a smooth base, positioning the elastic band correctly, centering the cap, and making small adjustments around the hairline and ears. Once the fit feels secure, light lace blending and targeted heat styling are usually enough to refine the bob.
Avoid over-tightening the cap or repeatedly applying heat to hair that already sits correctly. Work in small sections, check the finished style from the front, sides, and back, and focus on maintaining the clean silhouette that makes a short bob easy to wear.


 + 1
+ 1
 + 1
+ 1
 + 44
+ 44