What Is a Quick Weave? How It Works, Benefits & Care
Written by: Camila Witman
|
Published on
|
Updated on
|
Time to read 8 min
A quick weave is a hair extension installation method that attaches hair wefts to a protective cap or prepared base using bonding adhesive. It can create a variety of looks in less time than some traditional sew-in installations. However, the result depends on proper preparation, careful adhesive application, and safe removal. Understanding how quick weaves work can help you decide whether this styling method suits your hair, scalp, and maintenance routine.
Quick Answer
A quick weave is a hair extension technique in which wefts are bonded to a protective cap or prepared base instead of being sewn directly onto braided natural hair. It offers a relatively fast way to create different hairstyles, but adhesive use and removal require care.
What Is a Quick Weave?
A quick weave is a hair extension installation technique in which individual wefts are attached to a protective cap or prepared base with hair-bonding adhesive. The natural hair is usually braided, flattened, or otherwise secured underneath before the base is prepared. Once the wefts are attached, the hair can be cut, shaped, and styled into a finished look.
Quick weaves can be created with different hair types and textures, including straight, body wave, and curly styles. If you are planning a traditional quick weave, explore human hair bundles to compare available textures, lengths, and bundle options.
A quick weave can be styled into different looks depending on the selected hair texture and desired finish.
How Does a Quick Weave Work?
A typical quick weave involves preparing the natural hair, creating a protective base, attaching the hair wefts, and shaping the finished style. Watch the video below for a visual demonstration before reviewing each stage.
Video Tutorial
Watch a Quick Weave Installation
Follow the visual demonstration to understand the installation process and see how the steps fit together.
The following steps summarize the general process. Exact techniques vary by installation method and adhesive, so always follow the applicable product instructions.
Step 1
Prepare the Natural Hair
Start with clean, dry hair and arrange it into a flat, comfortable base. Braids or another suitable preparation method should not create excessive tension around the hairline or scalp. A smooth foundation helps the protective base sit more evenly.
Step 2
Prepare the Protective Base
Position a suitable cap or protective barrier according to the installation method. The base should sit securely and smoothly, with care taken to prevent adhesive from reaching natural hair or the scalp.
Step 3
Attach the Hair Wefts
Apply an appropriate bonding adhesive to the intended attachment area, following the product instructions. Position the wefts in sections and allow each bond to set as directed before continuing.
Step 4
Shape the Finished Style
Once the installation is secure, the hair can be trimmed, blended, and styled. Check the finished result for a balanced shape and comfortable fit without pulling or uncomfortable tension.
Important: A protective cap does not guarantee that adhesive cannot reach natural hair or the scalp. If you are unfamiliar with bonding products or base preparation, consider having the installation completed by an experienced stylist.
Quick Weave vs. Sew-In: What's the Difference?
Both methods use hair wefts to add length or volume, but they differ in how the extensions are attached. Your preferred installation method, sensitivity to adhesive, and maintenance needs should all factor into the decision.
Feature
Quick Weave
Sew-In
Attachment
Wefts are bonded to a prepared cap or base.
Wefts are sewn onto a braided foundation.
Installation
Can be quicker, depending on the design and technique.
Often requires more time for braiding and sewing.
Adhesive
Typically uses bonding adhesive.
Usually relies on thread rather than bonding glue.
Removal
Requires the adhesive to be properly released.
Requires careful removal of the thread and wefts.
Main consideration
Adhesive placement, barrier integrity, and removal.
Braid tension, sewing tension, and scalp comfort.
Neither method is automatically damage-free. Both can contribute to breakage or traction-related hair loss if installed too tightly, worn for prolonged periods, or removed incorrectly.
What Are the Benefits and Limitations of a Quick Weave?
Quick weaves are popular because they offer styling flexibility and can reduce installation time. However, the use of adhesive introduces considerations that should not be overlooked.
Faster Style Changes
A quick weave can be convenient when you want a new hairstyle without a lengthy sew-in process. Actual installation time depends on the style and technique.
Flexible Styling Options
Different weft textures, lengths, and colors can be combined to create looks ranging from sleek bobs to voluminous curls.
Potentially Lower Installation Cost
A quick weave may cost less than some sew-in installations, depending on the stylist, hair used, and complexity of the style.
Adhesive and Removal Risks
Glue can irritate the scalp or damage hair if it contacts natural strands or is removed with excessive pulling. A protective base does not eliminate every risk.
There is no single wear time that applies to every quick weave. Longevity depends on the adhesive, installation method, cap or base, styling habits, and how the hair and scalp respond during wear. A style that remains attached is not necessarily one that should continue to be worn.
Follow the installation and adhesive manufacturer's instructions and discuss an appropriate removal schedule with your stylist. Do not use a general estimate such as four to eight weeks as a guarantee that a quick weave is safe to keep in for that long.
Remove the style sooner if it becomes loose, pulls on your hairline, or causes itching, stinging, pain, or other irritation. Persistent discomfort should not be addressed by tightening the style or adding more adhesive.
How to Maintain and Remove a Quick Weave
Maintenance Tips
Protect the style overnight.
Use a satin or silk scarf or bonnet to reduce friction while sleeping.
Detangle gently.
Start at the ends and work upward gradually. Avoid pulling at the bonded tracks or the natural hair underneath.
Follow the adhesive guidance.
Avoid applying oils or other products directly to bonded areas unless the product instructions allow it, as they may affect attachment.
Pay attention to your scalp.
Maintain scalp hygiene where possible and do not ignore itching, stinging, pain, or signs of irritation.
How to Remove a Quick Weave Safely
Removing a quick weave requires patience because pulling on bonded wefts can cause breakage. The appropriate removal method depends on the adhesive used.
Step 1
Identify the Adhesive
Check the product instructions and choose a remover specifically suitable for the adhesive and installation method.
Step 2
Apply the Appropriate Remover
Work in small sections and follow the remover's directions, including its recommended waiting time. Keep products away from the eyes and avoid using them on irritated skin.
Step 3
Release the Wefts Without Pulling
Gently check whether the bond has loosened. If it still resists, apply more remover as directed and allow additional time. Never force the wefts or cap away from the hair.
Step 4
Cleanse and Condition
Once the installation is removed, clean away remaining residue according to the adhesive instructions, then wash and condition the natural hair gently.
Do not force removal. If the adhesive will not release, or you are unsure how to remove the installation without pulling on your hair, ask an experienced stylist for help.
Quick Weave vs. Quick Weave Wig
The terms can refer to different things. A traditional quick weave is an installation technique in which hair wefts are bonded to a prepared base. A quick weave wig, by contrast, may refer to a ready-to-wear wig marketed for a quick styling routine.
If you prefer a ready-to-wear option instead of bonding hair wefts to a cap, compare human hair wigs and check each product's construction and installation instructions.
If avoiding bonding glue is a priority, a glueless wig may be another option. The right choice depends on how you prefer to install, secure, and maintain your hairstyle.
Frequently Asked Questions About Quick Weaves
Can a quick weave damage natural hair?
Yes, it can if adhesive reaches natural hair, the installation creates excessive tension, or the style is removed by pulling. A protective cap does not eliminate every risk. Gentle installation and proper removal are important.
Can you install a quick weave at home?
Some people install quick weaves at home, but safe application requires appropriate base preparation, adhesive handling, and removal knowledge. If you are new to bonding products, consider consulting an experienced stylist.
Can you wash a quick weave?
Washing depends on the adhesive, cap construction, and installation instructions. Avoid vigorous rubbing or soaking bonded areas unless the method allows it, and maintain scalp hygiene throughout wear.
Is a quick weave the same as a sew-in?
No. A quick weave typically uses adhesive to attach wefts to a prepared base, while a sew-in attaches wefts to braided hair using thread. Both require careful installation and removal.
Final Thoughts
A quick weave offers a way to create a new hairstyle with hair wefts and a prepared base, often in less time than some sew-in methods. Its convenience should be balanced with careful adhesive use, comfortable installation, and proper removal. Understanding the process and its limitations helps you choose a styling method that better fits your hair, scalp, and routine.
Explore Hair Bundles
Related Human Hair Bundles for Quick Weave Styles
The hair bundles you choose influence the texture, length, color, and overall finish of a quick weave. Browse these options from Luvme Hair's Hair Bundles collection and compare textures, available lengths, and bundle quantities before choosing your style.
Swipe or scroll horizontally to explore more bundles.
Curly & Multi-Texture
Messy Burmese Curly / Silky Straight / Body Wave / Deep Wave Bundles
Available in multiple textures and 1-piece or 3-piece options. Choose a curl pattern or wave texture that matches your intended finish and styling routine.
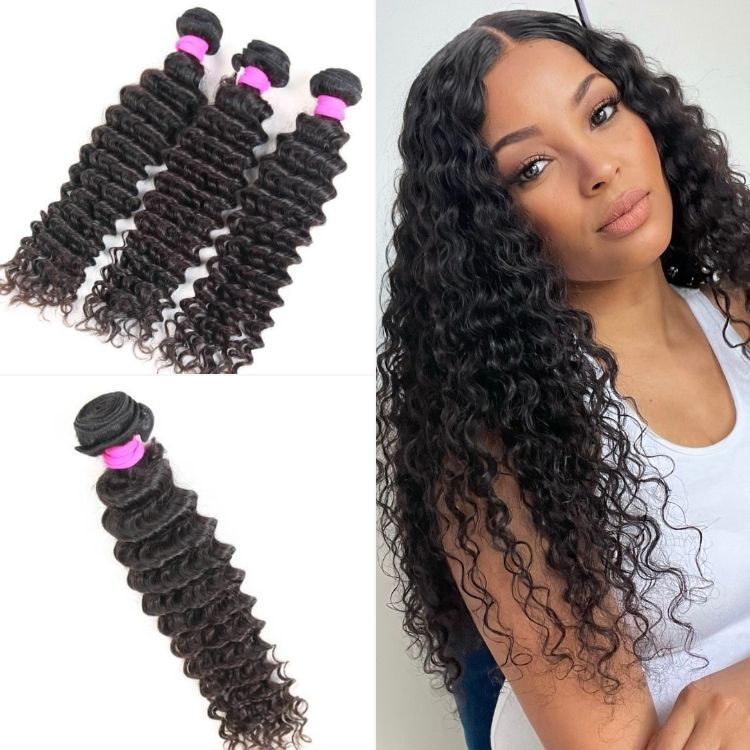
3pcs Deep Wave 100% Virgin Human Hair Curly Bundles
A defined wave pattern for a fuller, more textured look. Compare the available length combinations and total bundle weight when planning your installation.
Brown highlights add color dimension to a soft body wave texture. This option is available in single-bundle and multi-bundle configurations, so review the selected option before ordering.







 + 1
 + 1
 + 44