



Learning how to install Luvme crochet hair is easier when you understand the prep, braid base, crochet needle movement, and knot control. Luvme feather crochet hair is designed for protective styles such as miracle knots, boho braids, deep wave crochet hair, wet and wavy looks, and natural-textured crochet hair extensions.
This tutorial explains how to install Luvme crochet human hair step by step, what to prepare before you start, how to make the knots look natural, and how to care for the hair after installation. The goal is a secure style that feels comfortable, looks seamless, and stays manageable after the first day.
Table of Contents
- What Makes Luvme Crochet Hair Easier to Install?
- What You Need Before Installing Luvme Crochet Hair
- How to Prepare Your Natural Hair Before Installation
- How to Install Luvme Crochet Hair Step by Step
- How to Make Luvme Crochet Hair Look Natural
- How to Care for Luvme Crochet Hair After Installation
- Final Thoughts
What Makes Luvme Crochet Hair Easier to Install?
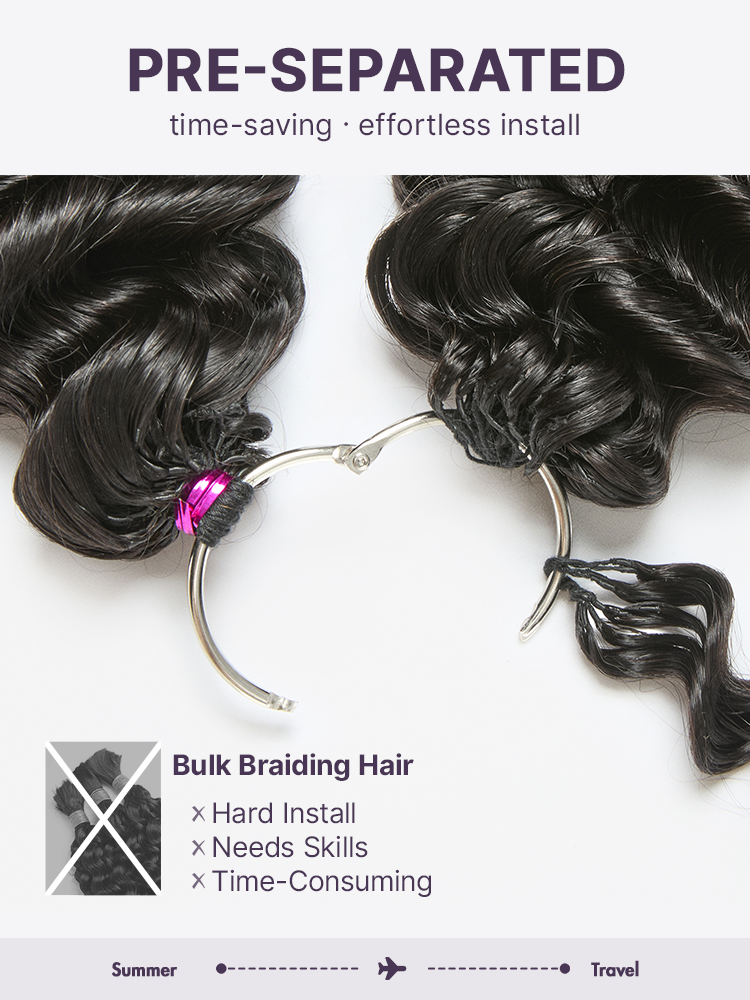
Luvme crochet hair is easier to install because the feather crochet pieces are pre-separated. With regular bulk braiding hair, you often need to pull apart each section before adding it to the braid base. That can take time and may create uneven knots if the hair is not separated consistently.
The pre-separated design helps each piece feel more ready to use. It supports a cleaner pull-through process, a more even install, and a lighter final look. This is helpful for beginners who want crochet hair extensions but do not want to spend hours preparing bulk hair before the first knot.
Time-Saving and Easier to Place
The pre-separated structure helps reduce prep work and makes each piece easier to control. For Luvme hair crochet installs, this can support more consistent spacing and a smoother overall finish.
It is especially useful for human crochet hair textures like deep wave, Burmese curly, wet and wavy, and kinky straight, where fullness needs to look intentional instead of bulky.
What You Need Before Installing Luvme Crochet Hair
Before installing Luvme crochet hair, prepare your tools and check what comes with the hair. Having everything ready helps the install feel smoother and prevents you from stopping halfway through the process.
Luvme Crochet Hair
Choose the texture and length that match your final style goal. Deep wave gives fullness, while kinky straight or wet and wavy creates a different finish.
Crochet Needle or Latch Hook
A crochet needle helps pull the hair through the braid base and close the loop securely.
Rat Tail Comb and Clips
Use these to create clean parts, section your hair, and keep the braid base organized.
Moisturizer and Satin Bonnet
Moisturize your natural hair before install and protect the crochet style at night after installation.
How to Prepare Your Natural Hair Before Installation
Good prep makes the install last longer and feel more comfortable. Start with clean hair and a healthy scalp. If there is product buildup, wash your hair first so the braid base feels fresh. After washing, apply a lightweight moisturizer or leave-in conditioner to help protect your natural hair under the style.
Detangle carefully before braiding. Your braid base should be flat enough for the crochet hair to sit smoothly, but not so tight that it pulls on your scalp. If the braids are too bulky, the knots may sit higher and look less natural. If the braids are too tight, the style may feel uncomfortable after a few hours.
How to Install Luvme Crochet Hair Step by Step
The basic installation method is simple: create a flat braid base, insert the crochet needle, pull the hair through, secure the knot, and repeat. The key is even spacing. Too much hair in one area can feel heavy, while too little can leave gaps.

Cornrow Your Natural Hair
Create a neat cornrow base that follows the shape you want for the final style. Keep the braids flat and secure, especially around the crown and nape.

Insert the Crochet Needle
Open the latch and slide the crochet needle under the braid. Do not force the hook through tight braids because that can cause scalp tension.

Pull the Hair Through
Place the pre-separated crochet hair onto the hook, close the latch, and pull the hair through the braid. Keep your movement gentle so the loop stays smooth.

Finish, Lock, and Repeat
Pull the ends through the loop and tighten gently until the knot feels secure. Repeat with even spacing, then fluff and shape the hair.
How to Make Luvme Crochet Hair Look Natural
A natural crochet install depends on the base, the knot size, and the amount of hair used. Keep the knots small and flat near visible areas such as the part, hairline, and crown. Avoid crowding too many pieces at the front because that can make the style look bulky.
Texture choice also matters. Luvme deep wave crochet hair creates volume and definition, while wet and wavy crochet hair gives a softer finish. Burmese curly crochet hair can add a rounded curl shape, and kinky straight texture can create fuller natural-looking movement. Choose the texture that matches the style you want to wear most.
How to Care for Luvme Crochet Hair After Installation
After installation, keep the hair soft by using lightweight moisture instead of heavy creams. For curly or deep wave crochet hair, refresh the mid-lengths and ends with a light mist when the curl pattern starts to look dry. Finger-detangle first, then use a wide-tooth comb only when needed.
At night, loosely gather the hair and cover it with a satin bonnet or scarf. This reduces friction, tangling, and frizz. Keep your scalp clean by applying product carefully and avoiding buildup at the braid base. When removing the style, take your time and loosen each knot gently so your natural hair stays protected.
Choose your crochet hair based on install goal: defined curls, soft boho volume, or visible length. These examples are selected from the crochet hair extensions collection.
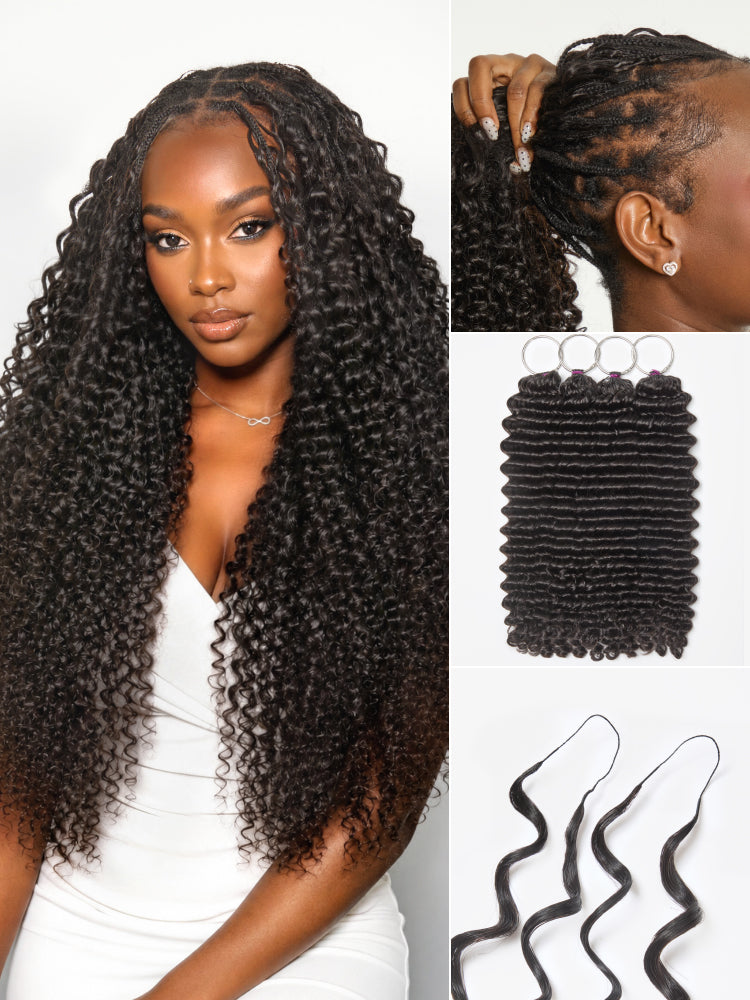
Boho Braids Crochet Hair
Best for a natural-looking base, fuller protective styling, and multiple texture choices.

Deep Wave Feather Crochet
Best for defined volume, soft movement, and fuller crochet installs.

Ombre Brown Crochet Hair
Best for warm color dimension with a protective deep wave texture.
Final Thoughts
Installing Luvme crochet hair is beginner-friendly when you prepare your natural hair, create a flat braid base, and use even spacing. The pre-separated feather crochet design helps reduce prep time and makes each piece easier to control, especially compared with regular bulk crochet hair.
For the best result, choose a texture that matches your final look, keep the knots small near visible areas, avoid using too much hair at the hairline, and protect the style at night. With the right installation and care, Luvme crochet hair can create a natural, comfortable, and polished protective style.


 + 1
+ 1
 + 1
+ 1
 + 44
+ 44